Make Cold Storage a Routine Before It Becomes an Ice Emergency
The easiest way to avoid repeated ice runs is to stop treating the cooler as a box that fixes whatever goes into it. Warm supplies, oversized food packages, frequent searching, and an unplanned menu can spend your cooling resources before the first full day at camp. Keeping food cold while camping starts at home with appropriate chilling, enough cold source, organized containers, and a way to check temperature. It continues through the drive, campsite placement, meal preparation, and decisions about leftovers. You may still need additional ice during a hot or extended trip, and that is a practical resupply decision rather than a failure. The goal is to make those decisions deliberately, with fewer unnecessary openings and a food plan that remains workable when the weather or schedule changes.
A: Begin with appropriately chilled supplies and a suitable cold source rather than relying on the cooler to do that job.
A: Use an appliance thermometer and follow USDA guidance for 40 degrees Fahrenheit or below.
A: It can reduce food-cooler openings but adds space, weight, and another cooling requirement.
A: Keep it contained and below ready-to-eat food, following current USDA guidance.
A: Yes. Food needs appropriate temperature control during loading, travel, delays, and camping.
A: No. Smell and appearance do not establish safe handling or storage history.
A: Replenish cooling or change the food plan rather than stretching perishable storage unsafely.
A: It lets you retrieve the right ingredients with less searching and fewer prolonged openings.
A: No. Confirm you can cool and store leftovers safely before preparing excess portions.
A: No. Choose a location that complies with the destination's wildlife and storage requirements.
Plan Refrigerated Space Before Grocery Shopping
Write a meal schedule and identify which ingredients need refrigeration throughout the trip. Give particular attention to the final day’s food, since it must share the cooler with a cold source for the longest period. Choose quantities that match the people actually attending rather than buying several large packages for convenience. The cooler has to accommodate containers and ice as well as ingredients. A deliberate shopping list makes that space easier to allocate. Build some meals around appropriate shelf-stable ingredients so every snack and side dish does not compete for cold storage. Keep preparation realistic for your campsite equipment and available water. A short familiar menu is easier to organize than a different elaborate recipe for every meal. That also reduces the number of containers you must open and repack. The purpose is a manageable kitchen, not a restrictive menu chosen solely to suit the cooler.
Begin With Properly Chilled Supplies
Use your refrigerator or freezer appropriately before departure instead of expecting the cooler to chill a large warm grocery load. Follow food-storage guidance and the instructions for any items you freeze. Plan the order in which frozen ingredients will be needed so dinner does not depend on guessing when something thaws. Keep cold storage continuous while loading the vehicle. A calm departure sequence is easier to manage than leaving refrigerated bags on the counter while the rest of camp equipment is arranged.
Prechill the cooler if its manufacturer recommends that practice, using a suitable cold source and allowing enough time. Do not count that preparatory ice as though it still has the same cooling capacity after absorbing heat. Check the condition of the cooler before adding food, including cleanliness, drain closure, and a properly functioning lid. These are ordinary setup tasks that are easier to complete in the driveway. Starting with a prepared box prevents avoidable work at camp.
Leave the final packing of refrigerated items until the rest of the vehicle is ready. Put the cooler in a position that remains accessible without unloading the entire cargo area. Consider the journey’s stops and the possibility of a delayed arrival. If the drive takes longer than planned, the food still needs suitable temperature control. Treat travel as part of the cold-storage period rather than assuming the camping clock starts only when the tent is pitched.
Use a Thermometer Rather Than a Guess
An appropriate appliance thermometer helps you judge the cooler’s food-storage conditions instead of relying on whether a bottle feels cold. Follow its instructions for placement and reading, and keep it where it can be checked without an extended search. USDA cooler guidance specifies 40 degrees Fahrenheit or below for cold food. Monitoring does not replace sound handling, but it provides information that a marketing claim or remaining ice cannot supply by itself. Make the check part of an ordinary meal routine so it actually happens.
Give Ice and Containers a Shared Packing Plan
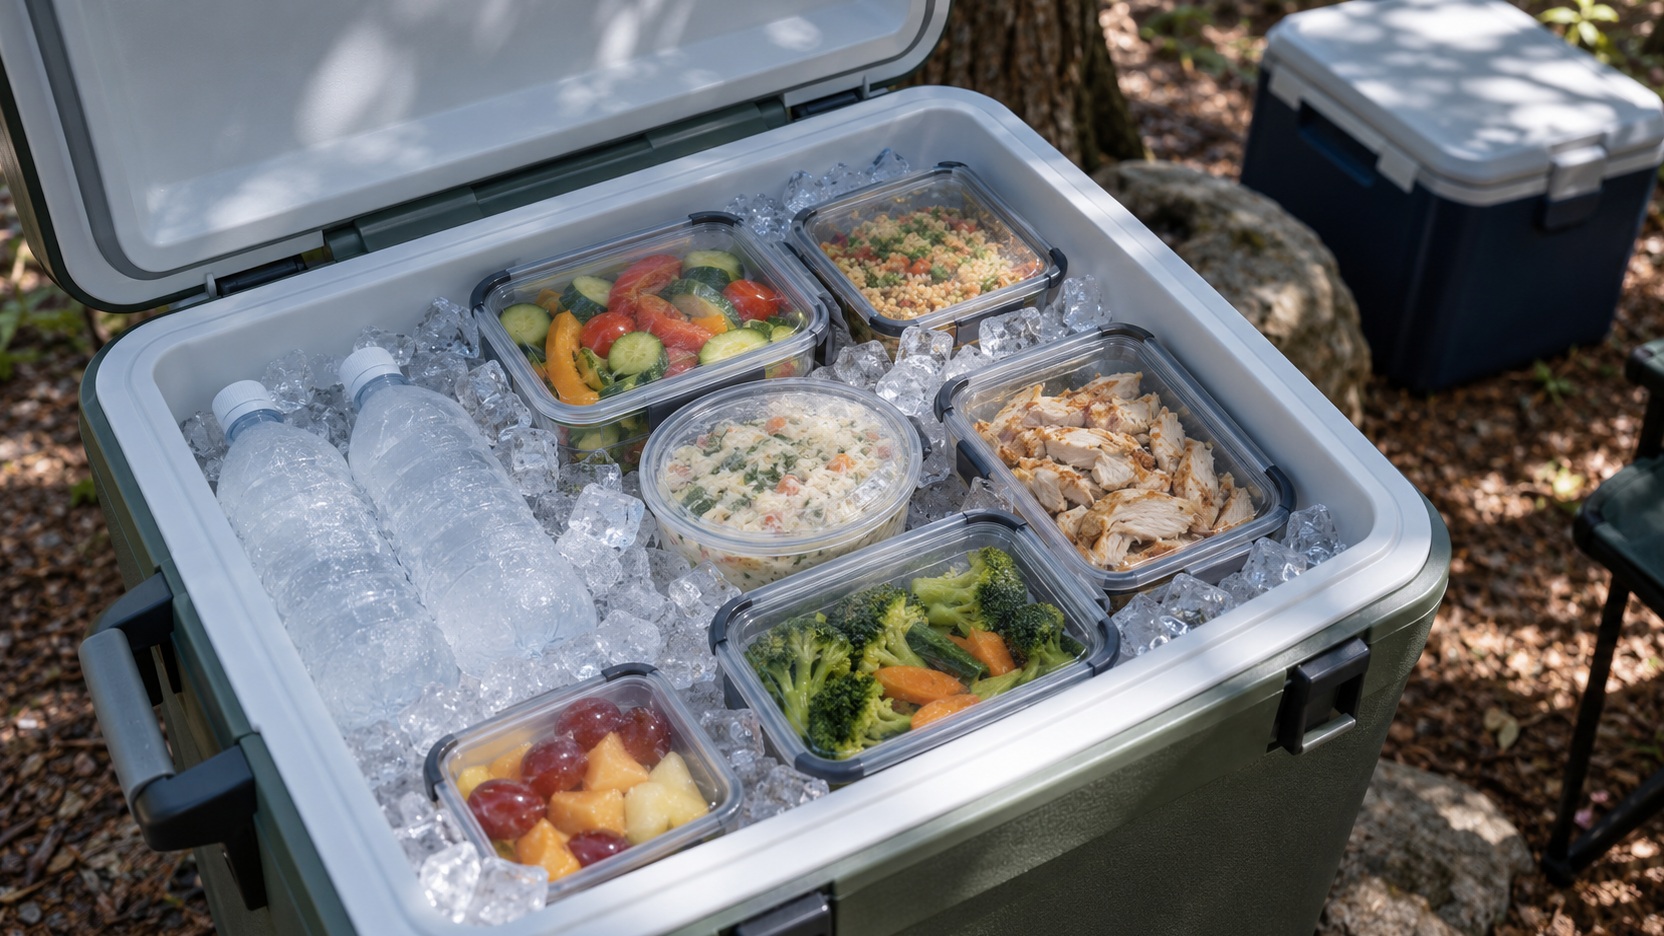
Select suitable cold sources and reserve the space they need before loading all the food. Large blocks and sealed frozen bottles can be convenient shapes in some arrangements, while smaller ice pieces fill gaps differently. Follow the cooler maker’s advice without assuming one packing method works identically in every box. Make sure containers can be retrieved without dismantling the entire load. The best arrangement balances cooling needs with practical access.
Use appropriate leak-resistant containers and keep food protected from meltwater. Inspect closures rather than assuming that a loose wrapper will stay dry for several days. Containers should be large enough for their contents without filling the cooler with unnecessary packaging. Check the fit with the lid closed and the cold source in place. A packing plan that works only before the ice is added has not yet solved the problem.
Separate Raw Ingredients From Ready-to-Eat Food
Keep raw meat and poultry contained and separated from food that will be eaten without further cooking. The USDA camping guidance recommends separate storage where possible and describes placing raw products below ready-to-eat items when sharing one cooler. Plan the physical arrangement so normal retrieval does not move raw packages over the rest of the food. Clean hands, suitable utensils, and proper preparation remain necessary alongside cold storage. A cold ingredient is not automatically a safely handled ingredient.
Think about what happens after a package is opened. Bring a suitable way to contain the remaining portion rather than improvising with a loosely folded bag. Keep preparation surfaces organized so dirty packaging does not return to the clean food area. Make sure the cook can identify the right container without taking every item out for inspection. Clear organization supports separation because people can follow it even when meals are busy.
Use a food thermometer for cooking tasks that require checking internal temperature, following current authoritative guidance for the particular food. Do not confuse that cooking tool with the appliance thermometer monitoring the cooler. They perform different jobs and should be stored and cleaned as directed. Plan both tools into the kitchen if the menu requires them. A dependable routine separates storage, preparation, cooking, and serving rather than assuming one check covers everything.
Reduce Searching With Meal-Based Organization
Arrange ingredients so you can collect what you need for a meal in a short deliberate retrieval. Keep containers recognizable and place later meals where they will not repeatedly obstruct the first day’s supplies. A simple written packing map or familiar container arrangement can be useful for a shared cooler. The method should be understandable to everyone who opens the lid. An organization system that only one person understands tends to disappear as soon as that person goes for a walk.
Gather utensils, plates, and the preparation surface before retrieving refrigerated food. That prevents a period of unnecessary exposure while someone searches for a knife or cleans the table. Take out the quantities you expect to use and return appropriate items promptly under food-safety guidance. Avoid leaving the cooler open while deciding what to cook. A meal plan helps because the decision has already been made.
Consider Separate Beverage Access
A dedicated drink cooler can reduce repeated openings of the food cooler when a group reaches for beverages throughout the day. It also adds another box, more packed volume, and another cold-source requirement. Compare those costs with the practical benefit for your group rather than treating a second cooler as compulsory equipment. For two people with limited vehicle space, deliberate access to one well-organized cooler may be easier. Choose the arrangement that people can follow without constant reminders.
Manage the Campsite Position Through the Day
Place the cooler in an appropriate shaded location where it remains accessible and closes fully after use. Consider how the sun moves rather than judging the location only at arrival. Keep the box away from stove heat and other avoidable sources of warming. Follow destination rules for wildlife and food storage even when the shadiest location seems convenient. Your choice of cold-storage position must fit those requirements as well as your kitchen arrangement.
If the cooler remains in a vehicle, think about access, temperature, and the rules at that location. Avoid blocking the lid with luggage that turns every retrieval into an unloading task. Keep required restraints and transport arrangements in place as directed for the journey. Reassess placement when the campsite changes or equipment is moved. An orderly setup can reduce unnecessary effort while keeping the cooler part of an appropriate storage plan.
A cover or shade solution must be compatible with the cooler and its use. Do not hide a latch, create a trip hazard, or make it so awkward to open that people leave the lid incompletely closed. The arrangement should encourage consistent ordinary behavior. A small improvement that everyone uses is more helpful than a complicated system that is abandoned after lunch. Check that the lid seals normally whenever the load is rearranged.
Have a Clear Response When Cooling Is Running Low
Know where replacement ice is available and how long the trip to obtain it would take. Check supply hours before relying on a nearby campground shop or small store. If the route is remote, choose a menu and cooling plan that acknowledge the limited resupply. Avoid interpreting a desire to skip ice runs as a reason to stretch perishable food beyond safe conditions. Reliable planning includes a point at which you replenish cooling or change the meal.
USDA outdoor food-safety advice says not to leave perishable food above 40 degrees Fahrenheit for more than two hours, reduced to one hour when the surrounding temperature exceeds 90 degrees. Follow that guidance and do not use smell or appearance to decide that mishandled food is safe. When storage history is uncertain, choose a safe alternative instead of gambling on dinner. A shelf-stable backup meal makes that decision easier.
Handle Leftovers as Part of the Original Plan
Before cooking, decide whether there is sufficient appropriate cold storage for leftovers and whether you can handle them safely under current guidance. Cooking extra without a storage plan can create more difficulty than it saves. Use suitable containers and avoid treating the cooler as an unlimited refrigerator into which any large warm pot can be placed. Follow authoritative procedures for cooling and storing the particular food. If those conditions cannot be met, adjust the cooking quantity from the start.
Keep track of what remains for the following day without leaving several containers open for inspection. A simple meal plan can be updated after dinner so breakfast does not begin with a search through uncertain leftovers. Separate food intended for disposal from supplies you plan to use. Follow local waste-handling and wildlife requirements throughout cleanup. Good cold storage is easier when the entire kitchen has a clear destination for each item.
After the trip, clean, rinse, and dry the cooler according to its care instructions. Inspect the lid seal, drain, and containers before putting the equipment away. Review which foods stayed unused and which tasks caused the longest openings. Use those observations to buy more accurately next time rather than automatically choosing a larger cooler. Fewer ice runs come from a repeatable routine with appropriate monitoring and realistic resupply, not from a promise that ice will never need replacing. Share the routine with the rest of the group before departure. Everyone should know where ingredients belong, how the lid closes, and when a temperature concern needs attention rather than another guess.